How to Prepare Your Files for Digital Printing
Learn how to prepare your files for digital printing with this expert guide from SE1 Picture Frames.
Digital printing has transformed fine art and photographic reproduction, delivering outstanding colour management and intricate detail.
Whether you’re an artist, photographer, or gallery curator, preparing your files properly is essential for achieving professional-quality prints.
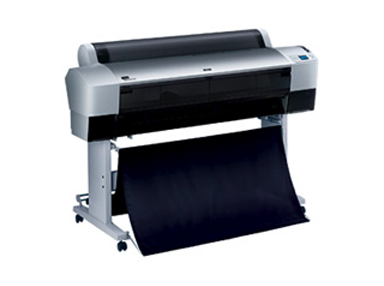
At SE1 Picture Frames, with over 30 years of experience in traditional and digital printmaking, we use our cutting-edge Epson Stylus Pro 9880 with UltraChrome HDR archival inks to bring your vision to life.
Follow this step-by-step guide to get your files ready for our digital printing services.
Why File Preparation Matters
A correctly prepared file ensures your digital prints—be they photographs, illustrations, or fine art reproductions—match your expectations. Errors like low resolution or incorrect sizing can result in pixelation, colour discrepancies, or delays.
Our London studio prints your file precisely as submitted, so adhering to these steps is vital to avoid disappointment.
Step 1: Choose the Right File Type
We recommend specific file formats to guarantee top-notch quality:
- TIFF: Our preferred choice for preserving detail, ideal for photos or fine art.
- PDF: Excellent for embedding fonts and maintaining consistency across platforms.
- Other Formats: We can work with most file types, but layered files (e.g., PSD) must be flattened before submission. Some formats may incur an extra charge.
Opt for TIFF or PDF to ensure the best outcome with our archival inkjet printing.
Step 2: Set the Resolution to 300 DPI
Resolution is crucial for sharp, exhibition-quality prints. Our minimum standard is:
- 300 DPI: This delivers crisp details on our Somerset Enhanced 330gsm fine art paper or other archival options. Files below 300 DPI may look blurry or pixelated.
To adjust this:
- In Photoshop, navigate to “Image” > “Image Size” and set it to 300 DPI.
- Verify your file’s resolution before saving—upscaling a low-res image won’t enhance quality.
Step 3: Size Your File Correctly
We print files at the exact dimensions you provide, including any borders. To get it right:
- Match Your Print Size: Save your file to the size you need (e.g., A4: 210 x 297mm, A1: 594 x 841mm).
- Include Borders: If you want a border, factor it into the file size. Prints are trimmed to size unless you specify otherwise (e.g., torn edges).
See our pricing list for standard sizes like A0 (£140 + VAT) or roll format (£150 + VAT per metre).
Step 4: Use CMYK Colour Mode
For accurate colour reproduction with our Epson Stylus Pro 9880:
- Switch to CMYK: This aligns with our printing process, unlike RGB, which is suited to screens. Vibrant RGB colours may shift in CMYK, so check your file after conversion.
- Basic Colour Correction: Included in our service, but starting with CMYK provides the best base.
In Adobe software, go to “Edit” > “Convert to Profile” and select CMYK.
Step 5: Check Fonts and Details
As we hand-finish every print, clarity is paramount:
- Embed Fonts: When saving as a PDF, ensure fonts are embedded to prevent substitutions.
- Flatten Layers: Merge all layers into a single image to avoid errors.
- Minimum Text Size: Use at least 6pt for legibility, particularly on smaller prints like A4.
Include clear instructions via email if you require specific finishes, such as torn edges or resizing.
Step 6: Submit Your Files Correctly
Ready to send? Here’s how:
- Upload via WeTransfer: Email files to info@se1pictureframes.co.uk with detailed instructions (e.g., size, paper preference).
- Specify Paper: Our default is Somerset Enhanced 330gsm (100% cotton, radiant white satin), but let us know if you’d prefer another archival option.
- Turnaround Time: Typically 72 hours, though large orders or busy periods may take longer.
Double-check everything—file type, DPI, size—before sending, as we print exactly what you submit.
Bonus Tips for Perfect Prints
- Proofing Option: Try our Woodstock Superfine 310gsm roll paper proofing service (£65 + VAT per metre) to test your design.
- Collection or Postage: Book an appointment to collect from our Alaska Buildings studio or choose Royal Mail postage (£25+ to UK/Europe).
- Need Advice?: Call us on 020 7394 0235 or use our contact form for file prep support.
Bring Your Vision to Life with SE1 Picture Frames
Preparing your files for digital printing needn’t be daunting. With over three decades of expertise, SE1 Picture Frames produces archival-quality prints trusted by artists, photographers, and galleries worldwide. From basic colour correction to precision cutting, our digital printing services cover it all.
Ready to print? Submit your files today or request a quote to get started. Visit us at Alaska Buildings, 61 Grange Road, London SE1 3BH—your local specialists in fine art digital printing!
Frequently Asked Questions (FAQs)
1. What file types does SE1 Picture Frames accept for digital printing?
We prefer TIFF and PDF files for the best quality, as they preserve detail and embed fonts. We can accommodate other formats, but layered files must be flattened, and some may incur an additional fee. Learn more about our digital printing services.
2. Why do I need 300 DPI for my print files?
A resolution of 300 DPI ensures your prints are sharp and detailed, especially on our archival fine art papers like Somerset Enhanced 330gsm. Lower resolutions (e.g., 72 DPI) may result in pixelation, so always save at 300 DPI or higher.
3. Can I use RGB instead of CMYK for my files?
We recommend switching to CMYK, as it matches our printing process and avoids unexpected colour shifts. RGB is better suited to screens. Our team offers basic colour correction if needed—get in touch via our contact page.
4. How do I include a border in my digital print?
Save your file to the exact size you want, including the border dimensions. For example, an A4 print (210 x 297mm) with a 10mm border should be saved as 230 x 317mm. Specify any finishing preferences (e.g., torn edges) when you submit your file.
5. What’s the turnaround time for digital printing at SE1 Picture Frames?
Our standard turnaround is 72 hours, but this may extend during busy periods or for large orders. Need it sooner? Contact us at info@se1pictureframes.co.uk or 020 7394 0235 to discuss your timeline.
6. Can I choose a different paper for my print?
Yes! Our default is Somerset Enhanced 330gsm (100% cotton, radiant white satin), but we offer other archival options. Mention your preference when sending your files via WeTransfer. Check our pricing for details.
7. How do I collect my prints from your London studio?
Collection is by appointment only at Alaska Buildings, 61 Grange Road, London SE1 3BH. Book via our contact form or call us. Prints are flat-packed in archival tissue, with postal tubes available for a fee.
8. What if I’m unsure about my file setup?
No worries—we’re here to help! Send us your file or questions to info@se1pictureframes.co.uk, and we’ll guide you. You can also request our proofing service on Woodstock Superfine 310gsm (£65 + VAT per metre) to test your design.

Address
BY APPOINTMENT ONLY
SE1 Picture Frames, Alaska Buildings,
61 Grange Road, London,
SE1 3BH, United Kingdom
Nearest tube: London Bridge, Bermondsey, Borough
Bus: Number 1 and 78.
Free visitor parking available:
Entrance is via Bacon Grove just off Grange road. Enter the Alaska Buildings through the large electric gate. Push buzzer and speak to security to gain access.
Email Address
Phone Numbers
Contact us
We are usually on site but to avoid disappointment and to allow us plenty of time to discuss your project with you, please contact us and book an appointment before you set off.
On arrival please report to security.
Request a Quote
Please be aware that an accurate quote is usually only possible once we have seen the art work and discussed all possibilities with you. Our standard framing is to conservation standards and this will be reflected in the quote unless otherwise specified.